Using the Open Ended Slide
An Open Ended slide help you see things from others' perspectives as you get feedback in their own words instead of stock answers.
What is an Open-Ended question?
Open-ended questions allow respondents to answer in open text format so that they can answer based on their complete knowledge, feeling, and understanding. It means that the response to this question is not limited to a set of options.
How to make an Open Ended question?
Step 1: Create your Slide and Write your Question
Start by creating a new slide and selecting the Open Ended slide type from the options. Write your question or statement in the 'your question' box.
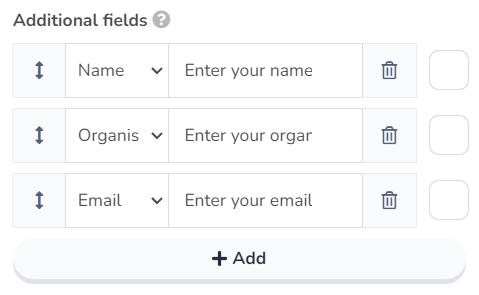
Step 2: Add Additional fields
You can collect additional info from each response such as the responder's name, team name, etc. Want to know more about Additional fields on AhaSlides? See here for more.

Step 3: Change your Open Ended slide's Settings
Change the settings of your Open Ended slide to your liking. There are 7 settings that you can change:
- Time limit (available for Edu Medium, Edu Large, Essential, Pro, Enterprise): This applies a time limit to the slide. When checked, you can choose your time limit between 5 seconds and 20 minutes.
- Hide results (available for Edu Large, Pro, Enterprise): This hides the submitted responses from the presenter's screen as they're being submitted. On the slide, there will be a button to reveal the responses whenever you want.
- Change layout: You can choose how the result is displayed on the presenter screen. There are 2 layouts available: Grid or One by one
- Lock submission (available for Edu Medium, Edu Large, Essential, Pro, Enterprise): This blocks participant from submitting any more responses to your Open Ended slide.
- Allow audience to submit more than once: This allows each participant to submit their responses an unlimited amount of times.
- Allow audience to submit images: Participants can share images as answers instead of submitting normal answers. See here for how participants can share images with Open Ended slide
- Filter profanity: This turns on the profanity filter, which automatically censors English language swear words when they're submitted by your audience. (Note: checking this box will apply the profanity filter throughout your entire presentation.)
Step 4: Present and get Responses
Once you press the 'Present' button, your participants will be able to submit their responses to your Open Ended slide.
You can manually delete any response in the Open Ended slide, simply find that submission and press the 'X' icon to remove the response.
Smart Grouping for Open Ended submissions

Smart Grouping is only avaialble when the Open-Ended slide receives more than 10 submissions.
This feature will only work once per session for each slide, please only group when everyone has submitted their answers.
This feature will only work once per session for each slide, please only group when everyone has submitted their answers.
AhaSlides lets you smart group Open-Ended submissions, making it easier for presenters to spot patterns and understand audience responses quickly. Similar submissions are automatically grouped for better clarity.
How to Use Smart Grouping:
- While presenting, go to the bottom of the presenter’s screen.
- When everyone has submitted their answers, click the ‘Group’ icon to cluster similar responses.
- Click the icon again to ungroup if needed.

The Open-Ended slide supports unlimited submissions.
Related Articles
Using the Content Slide
The content slide lets you create and customise text and images. This slide type lets you edit directly on the canvas, so you have full control over the layout. How does the Content Slide work? The content slide is a non-interactive slide, meaning ...Design your Theme on AhaSlides
AhaSlides allows you to customize your presentation to match your style and branding. You can choose from pre-made themes, personalize your background, and customize the color palette of your charts and result displays. These features help you create ...Using your Google Slides Presentation with AhaSlides
You can embed a Google Slides presentation into AhaSlides. Once embedded, you can present it within AhaSlides. Importing your Google Slides Presentation 1. On your Google Slides presentation, click on File >>> Share >>> Publish to web 2. Click the ...Creating a Poll question on AhaSlides
A poll slide is a quick and easy way to get live opinions in poll format from your audience. How does a Poll slide Work? In a poll, you ask a question and provide between 2 and 30 answer options. Your audience vote for one or more of the answer ...Undo/Redo Function on AhaSlides
AhaSlides now supports an Undo/Redo function that lets you easily reverse or reapply changes made while editing a slide. Whether you've added, updated, or deleted content, you can quickly undo or redo your actions with just a click — helping you work ...